Original Gutermann Glue is Now Available!!!
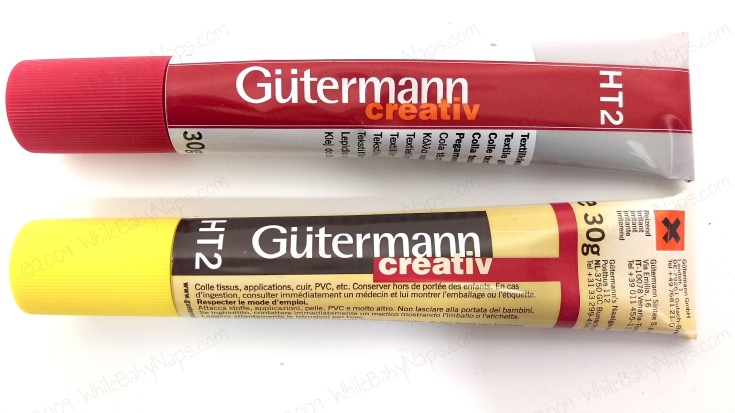
I. AM. BEYOND. ECSTATIC!!!! As stated in their letter to me, Gutermann glue is back in production and on the market after meeting all legal requirements. It’s the same formula, same tube and tip but in a new vibrant color packaging. I’m sure you’ll agree with me that it’s a beauty. Take a look of this lovely red!
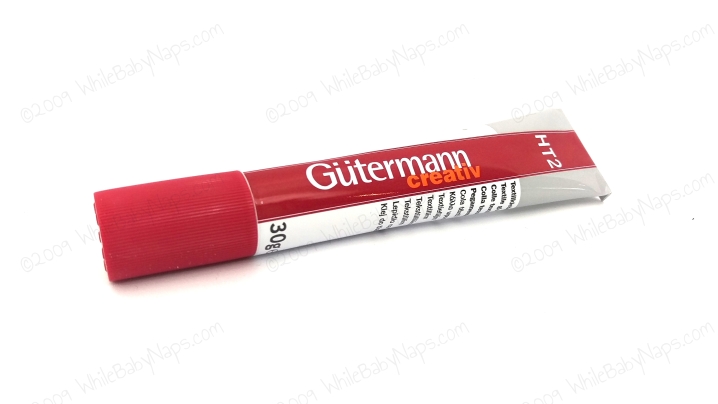
Grab yours at https://www.etsy.com/shop/whilebabynaps?ref=hdr_shop_menu§ion_id=6658410
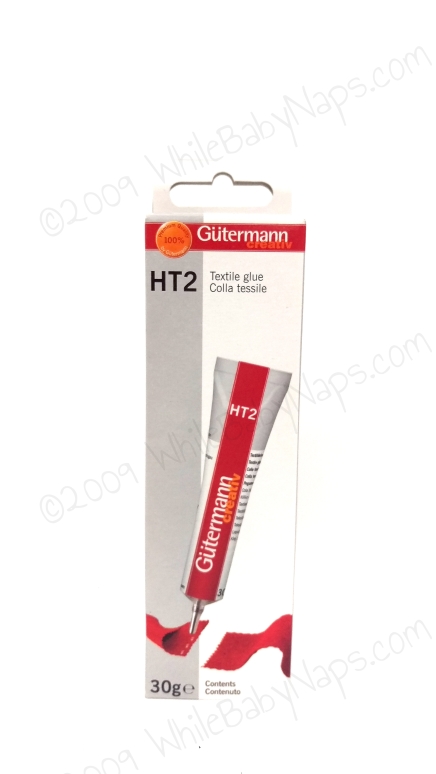
Original formula is now in a red and gray tube.
Let me know if you want a custom listing to stock up. Please feel free to contact me directly at http://www.clutchframes@whilebabynaps.com.
Kindly,
Thy K
Save time: Shortcut for inserting your fabric into your purse frame!
Though my PDF tutorial shows you the tried-and-true way to finish your purse and making a clutch, I have a shortcut that has worked very well for me. It saves me time from having to pre-press the clutch prior to inserting it into the purse frame.
Now, I have to admit that I’m not a big ironing person. In fact, I am quite embarrassed to say that 8 or 9 years ago, I had to ask my husband “Papi, how do you turn the iron on?” 🙂
Yes, for someone who can whip up a Homecoming dress in high school without a pattern, I didn’t always know how to use the iron. A pre-requisite when shopping for my clothes is: will it need to be ironed? Oh, Stacy London and Clinton Kelly would have a field day with me, I’m sure!
So here’s the shortcut. (BTW, this coordinates with step #13 of my tutorial).
For step #13, I only sew about 1 inch from point E and then stop. I do not go to the middle of the clutch.
See how the 1st inch is nicely sewn as per step #13? I’ll save the rest unfinished and after I turn it right-side out, I then finish it with a zig-zag stitch.
This helps me in 2 ways:
1) Skips the dreaded ironing step, but more importantly …
2) By sewing it shut in this way, it actually does a better job of compressing the layers thereby allowing the fabric to be inserted into the purse frame really easily.
You will notice that the 1st inch is required because that hinge area is so crucial. However, the areas above that and around that is hidden when you insert and glue it into the frame.
I am able to make upholstery weight fabric + 4 layers of heavy fusible interface fit into the frame without any problem. For me, it also saves me time as it’s quicker to sew then it is to fire up the iron and press.
The second tip is the top edge. Since I only sew 1 inch from point E and S (or the starting points of the hinge area), I leave the rest of the clutch unfinished.
This makes it easier to invert and pull both layers the right-side out. To finish the top, I use a straight stitch straight across. You can use zig-zag stitch as well.
The benefit here is the same as the ones above: it saves me time and it makes inserting bulky fabrics into the purse frame a breeze.
When I insert this into the frame, you will not see the stitches as I’ve kept it close to the edge.
And by using Gutermann glue for the fabric and frame, you can be assured of its adhesive integrity.
Enjoy your sewing!


